A weighted menu item is usually measured in pounds or kilograms, and it is used when selling items by weight. This is very common in supermarkets when buying fruit, vegetable, or meat, but we can also use a variation of this method to sell menu items in a restaurant environment.
The programming style is most commonly found in fast-paced restaurants like employee lounges, school cantinas, etc. We mainly use it because it’s a much faster way of calculating the cost of the menu item when the customers have the freedom to choose their own combination of items, such as making their own salad.
The concept is simple:
the customers pick up an empty container,
they go to the salad bar and add all the ingredients they want,
then the entire container gets weight,
and they pay the price per pound.
There are many advantages to using this system, including
lower cost of labor, not needing an employee or two to make the salads,
interactive meal, where the customers make their own creation
and unlimited choices, since there are so many ways to make salads, people never get bored.
General Consideration when Programming Weighed Menu Items
There are 2 ways of measuring the weight of the items for the POS:
Manually, where the employed have a scale in front of them, and they will enter the weight manually into the POS
Automatically, where the scale is connected to the workstation and will input the weight automatically, eliminating an extra step.
The automatic way is ideal because it’s faster and will avoid any operator errors that might occur, but digital scales compatible with the workstation can be a little bit more expensive.
If you plan on implementing weighted menu items in your restaurant and need to buy scales, go for compatible ones and use the automatic version.
If you already have a simple scale, try the system manually first, and if it becomes very popular, then implement the automatic scales.
Need help with your Micros Simphopny system? We have a fantastic Facebook community of like-minded individuals that can answer all your questions! Join for free below!
Programming weighted menu items in Simphony EMC makes life very simple for the managers because we only need to use one menu item, and there is virtually no maintenance.
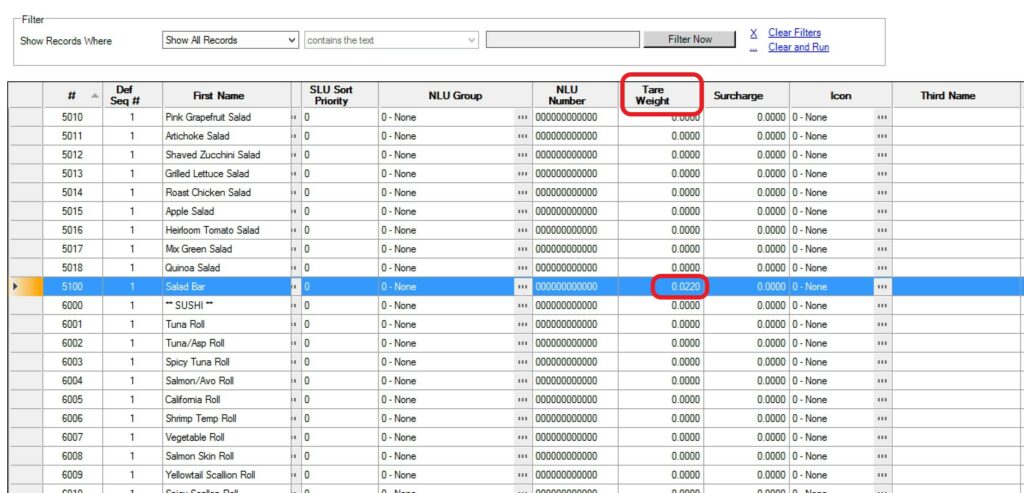
The only caveat is that if you are using multiple container sizes, we will need a menu item for each container’s size to enter the Tare Weight accurately.
The Tare Weight is the weight of the container itself, and we need to deduct it from the total weight in order only to charge the customer for the food. Thankfully, Simphony does this automatically for us, so we don’t have to worry about it once we program it.
Programming the Menu Item Classes
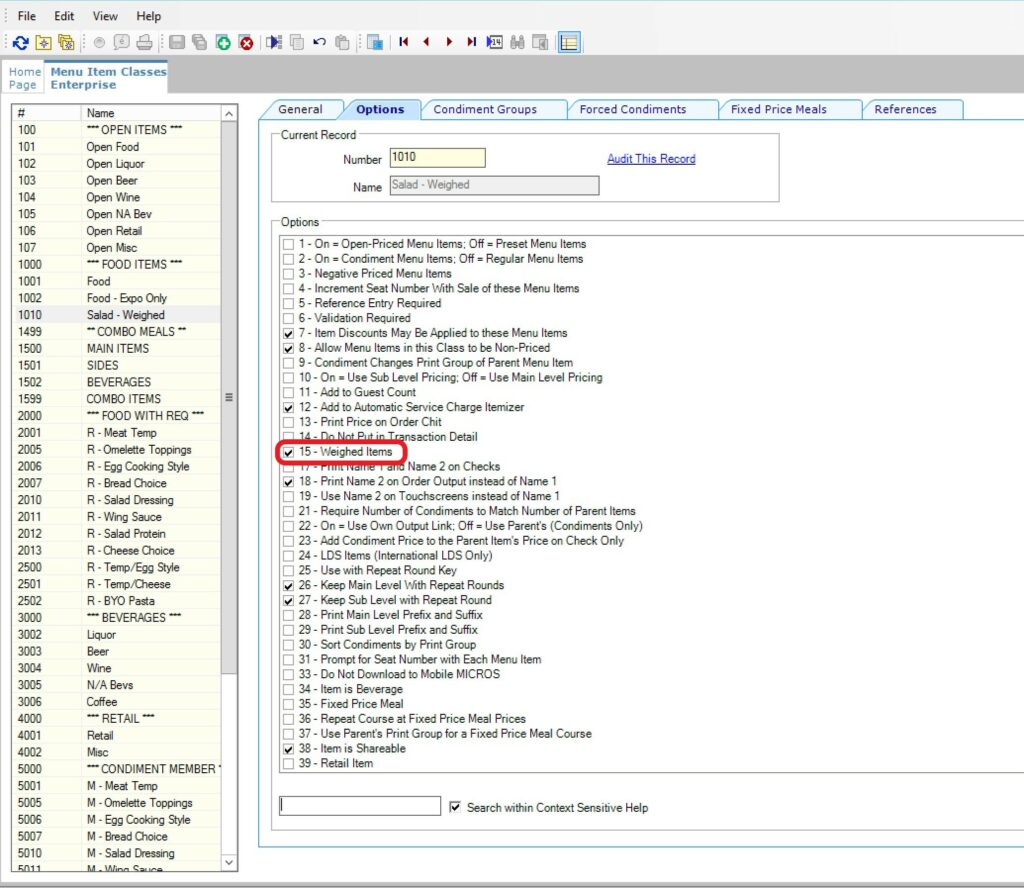
First, we need to program a new menu item class for the weighted menu items. Our new class will need option bit #15 enabled to tell the system to expect a weight entry.
#15 – Weighed Items – Select if all menu items in this class are sold by weight.
Steps to follow:
Open the Menu Item Classes tab in EMC -> Configuration -> Menu Item Classes.
Add a new menu item class by selecting an existing Food Menu Item Class that is already in use and programmed correctly. We will use this as a template.
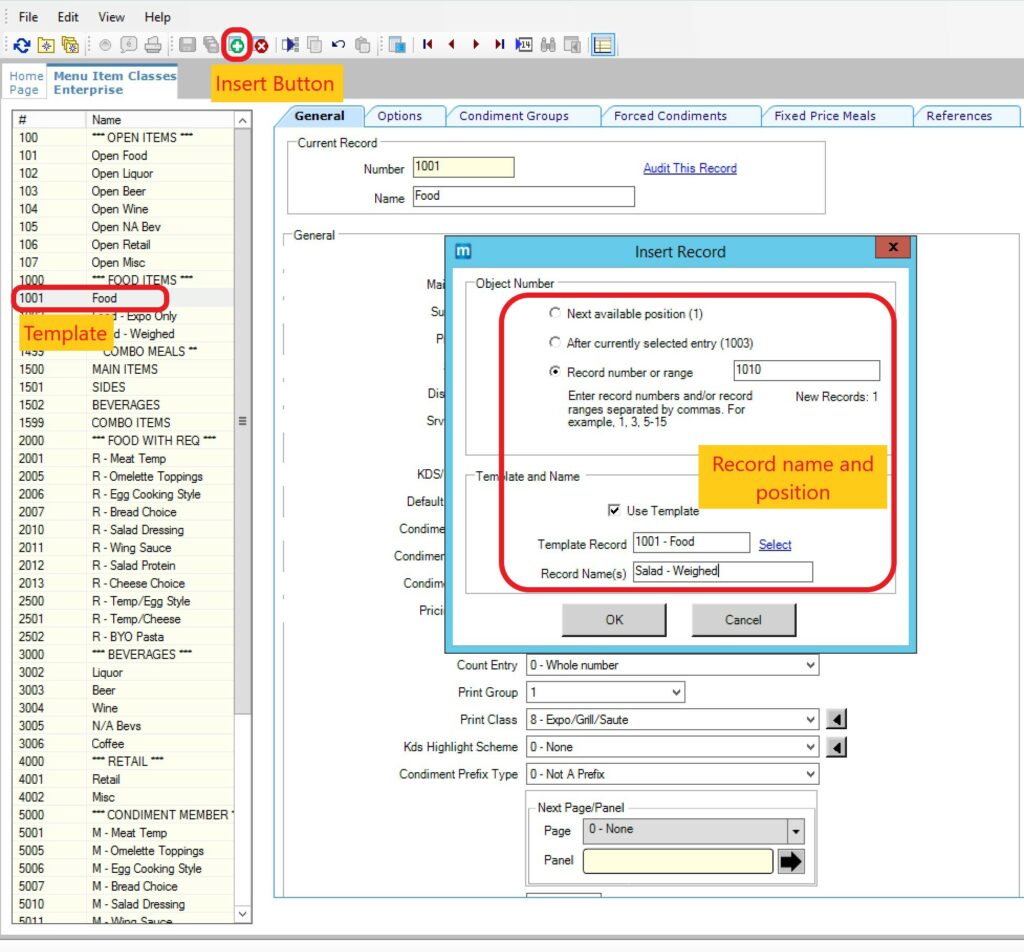
After selecting the “template” menu item class, click the insert button in the top bar (Green circle with a plus sign).
Enter the position where the new Menu Item Class should be added,
The next step is to configure our new Menu Item Class to prompt for the weight of the Item.
First, check the General tab and ensure the Tax and Print Class are correct.
Next, move to the options tab and enable option #15 – Weighed Items, and also check the rest of the option bits to ensure everything is programmed correctly.
Finally, check the Condiment Groups to ensure you allow any needed condiments, such as extra proteins or other items not included in the salad bar.
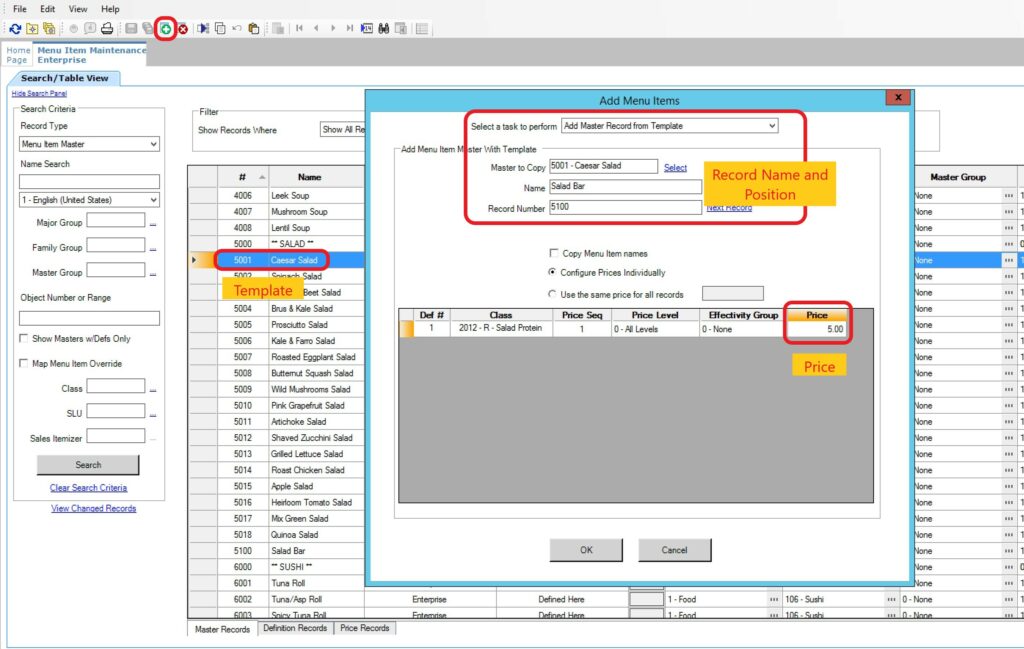
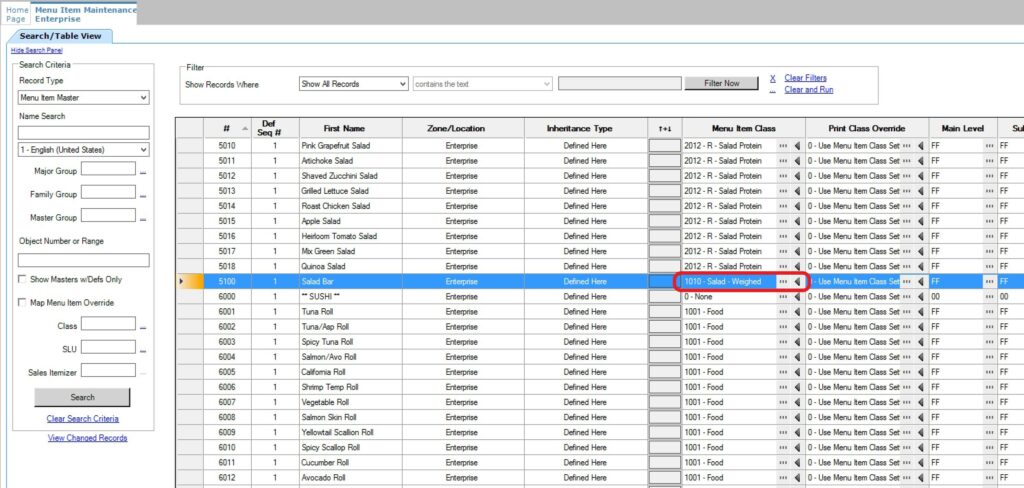
Now that our new Menu Item has been added, we need to make a few changes in the definition section:
Change its menu item class to Weighted Menu Item.
Enter the correct Tare Weight for the empty container.
You will also have to ensure that the menu item is visible on the POS by adding it to an SLU or by hard-coding it to the screen in Page Design. If you used a good template when adding the new item, this should be done already.
Setting up Control Parameters
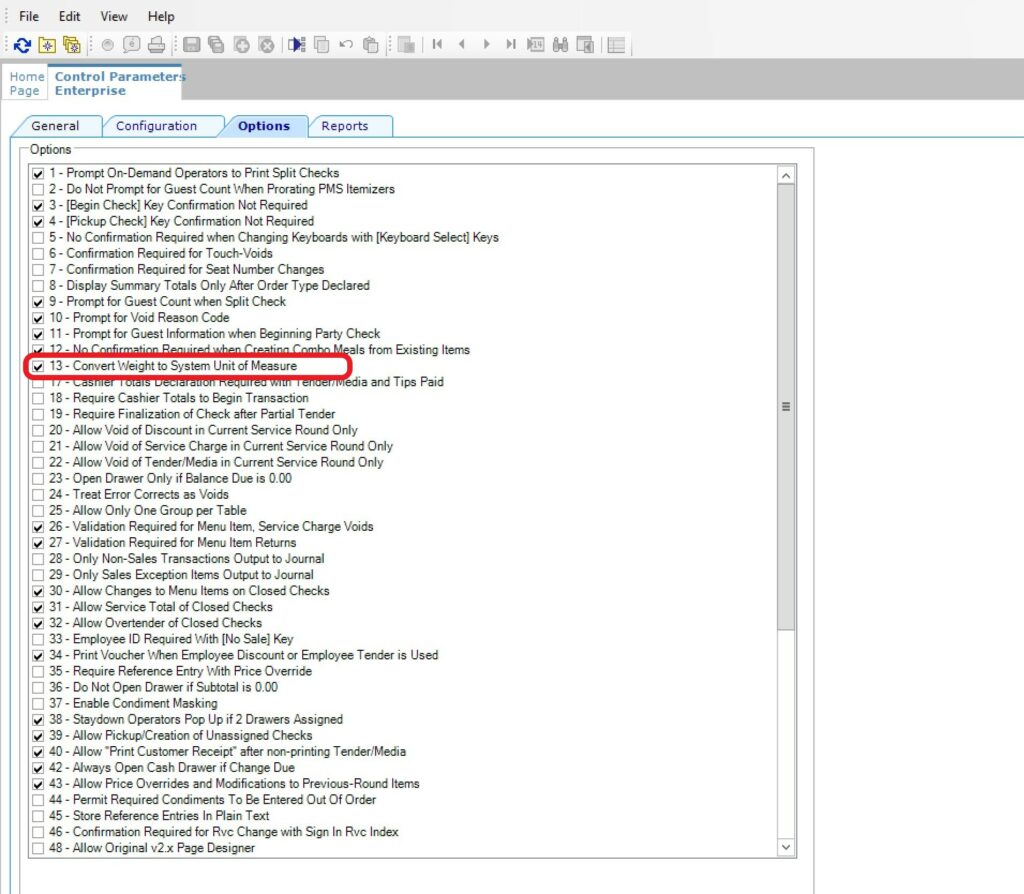
If you are using weighted menu items, there is an option bit you have to enable in the Control Parameters module in order to ensure compliance with local regulations, especially in the United States.
Open the Control Parameters module and enable option bit #13 – Convert Weight to System Unit of Measure.
Configuring the Scale for the Workstation
If you are going to use a scale connected to the workstation to read the weight automatically, you will need to configure it in the workstation module.
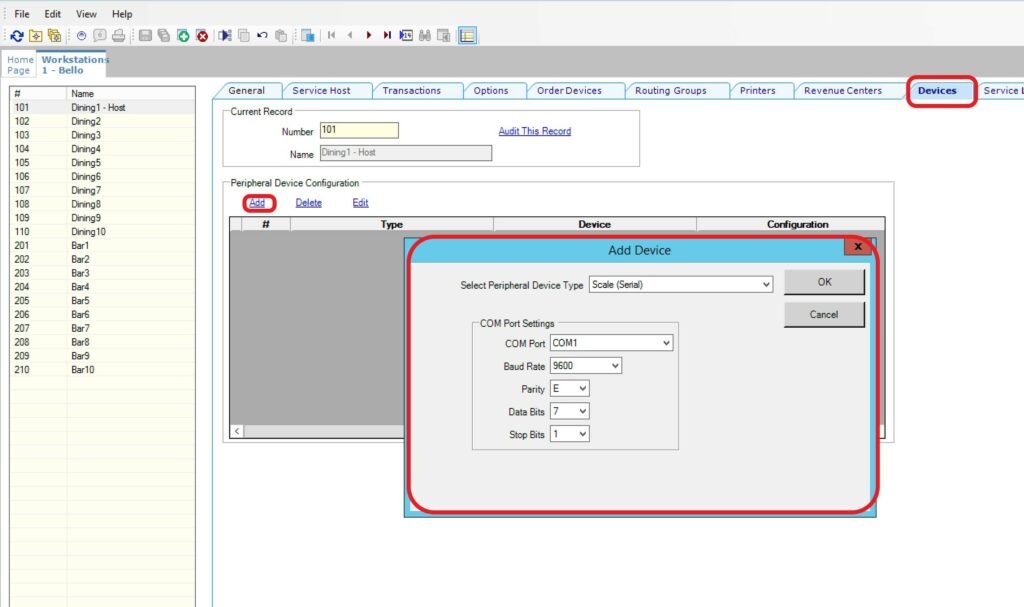
At the property level, in the setup tab, open the workstations module and select the workstation with the scale attached.
Next, navigate to the devices tab and add a new peripheral device.
Select “Scale (serial)” from the dropdown and configure the COM port settings as below:
COM Port: select the port you are using on the workstation
Baud Rate: 9600
Parity: E
Data Bits: 7
Stop Bits: 1
Once the setup is complete, save the settings, update the workstation, and reboot it. This is important, as most hardware changes require a complete system restart in order for the workstation to start recognizing the new Devices. The same applies when adding cash drawers, scanners, and other peripherals.
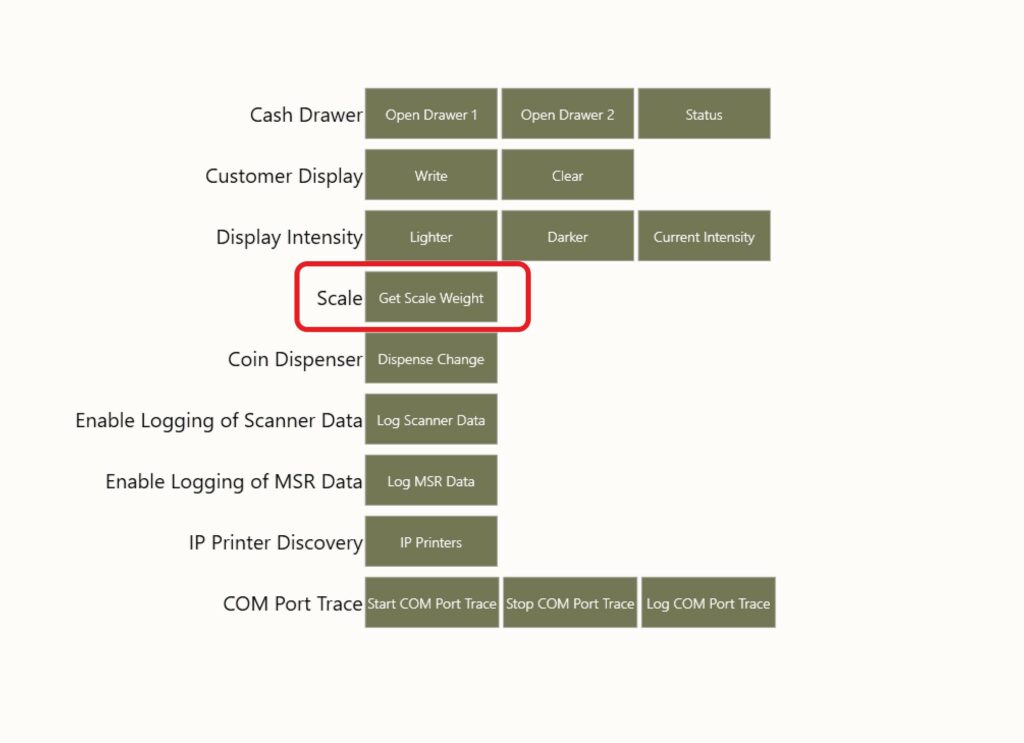
After the workstation restarts, you can use the built-in device diagnostics to test the connection:
Using a manager card, sign in to the workstation and go to the manager functions screen
Launch PMC and select the Functions tab
In the Device Diagnostics, click the “Get Scale Weight” button to test the connection to the scale.
Once the scale is connected and confirmed operation with the diagnostic test, the weight will be automatically entered at the workstation when the “Salad Bar” menu item is added to the menu.
If you get manually prompted for the weight when pressing the Salad Bar menu item, it means the scale is not configured correctly, and you need to troubleshoot the connection. Try a restart of the workstation. That usually fixes it.
If you are looking for comprehensive Simphony Training, we have a complete online course and support platform. More details below.
The weight function is made for cafeteria and buffet stile places so it’s not made to print on kitchen printers. I will run some tests to see how we can make it print in kitchen and let you know if I find anything.


4 thoughts on “Programming Weighed Menu Items in Micros Simphony V19”
Hello Mike,
Thanks alot for the Tip. Is there a way I can have the weights print on the order tickets just like the way 3700 used to?
It should print if the menu items class has the correct print class attached.
The weight does not come out on the order devices, and this is a huge problem for operations. With RES3700 everything worked
The weight function is made for cafeteria and buffet stile places so it’s not made to print on kitchen printers. I will run some tests to see how we can make it print in kitchen and let you know if I find anything.